As common as MTK androids have become, one of the major challenges being faced by engineers and individuals using the MTK androids is the lack of supports whenever there is any software related problems with the phone.
And as far as the MTK androids are concerned, there is only one certain solution to any software related problems any MTK android might have and that is... flashing MTK STOCK ROM.
YES. I know you will say "how?". Your answers are given here.
How to Backup MTK Android Stock ROM
Backing up any MTK android stock ROM would not have been possible if not with the help of the MTK Droid Tools.MTK Droid Tools is a Windows program released by one of the XDA developers recently. The MTK Droid Tools has proven so useful recently.
As a matter of fact, I have used the MTK Droid Tools to backup several stock ROMs of MTK android devices and used the backups to revive some dead MTK android devices which include Tecno Q1, Tecno M7, F7, some infinix and iTel phones.
Download the MTK Droid Tools Setup here or HERE
Backing Up MTK Android Stock ROM
- Download the MTK Droid Tools from the link above.
- Download and Install USB Vcom Auto driver for all MTK Android Devices.
- Root the phone.
- Proceed carefully to the instructions given below;

Now, follow the instructions below:
i- Reboot your MTK android to CWM Recovery using the right key combinations for the phone. Search Google for your particular phone or use the comment box below to ask for yours.
ii- On your Windows PC, where you extracted the MTK Droid Tools folder you downloaded above; open MTK Droid Tools.exe as administrator.
How? Right-click the MTK Droid Tools.exe and select open as administrator.
Wait until MTK Droid Tools detects the phone. Once detected, you will notice that the colour on the lower-left of the program turn cyan-blue.
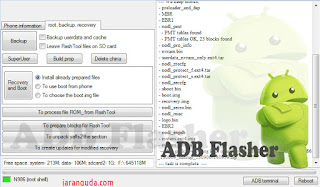
iii- Now, click on the Root, Backup Recovery tab of the MTK Droid Tools and click Backup to start the Full Backup.
iv- Wait for the Full Stock ROM backup process to complete. You can check for the backed up stock ROM on this folder: \mtkdroidtools\backups\the-mtk-phone-model-number. The folder is within MTK Droid Tools folder in short.
v- Just before the process completes, MTK Droid Tools would ask "Pack Up the Backup?". Select No and wait until Droid Tools display Task Complete.
Now, you have successfully backed up the stock ROM of your MTK android device. But the task is not fully completed yet, so, don't close MTK Droid Tools.
You need to prepare the backed up stock ROM so that you could be able to flash it on the phone next time you need it.
Preparing Backed up Stock ROM for Flashing
1- On MTK Droid Tools, click To Prepare Blocks for Flash Tool.
2- On the new Window that opens up, navigate to the folder where you saved the backed up stock ROM and select the file.md5 and click Open.
3- Wait for the MTK Droid Tools to complete the process and copy the files for the flash tool. Once completed, you will see Task Completed on the display.
4- Now, you have created backup of your MTK android device stock ROM flashable via SP Flash Tool.
How to Flash Backed Up Stock ROM On MTK Androids Using SP Flash
1- Download and install setup SP Flash Tool on your Windows PC. You can download SP Flash Tool from here.
2- Open the folder where you extracted the SP Flash Tool. Right-click on SP Flash Tool.exe and run it as administrator.
3- Click Scatter Loading on the SP Flash Tool.
4- Navigate to !File-to-Flash folder on the MTK Droid Tools where you saved the stock ROM you have backed up for the MTK android and select the scatter file from there.
If you have several files from there, you should open the folder for the MTK phone you wish to flash and select the exact scatter file.5- All the files to be flashed would be loaded once the scatter file is selected.
You should mark all boxes EXCEPT Preloader, and DSP_bl to avoid bricking the phone or boot loop.6- Now, remove the battery from the phone and re-insert it. Click Download from SP Flash Tool. A prompt would appear, just click YES.
7- Quickly connect your phone to the PC using USB Cable once you click yes above.
Now, seat back and relax. Wait for the process to complete.
Immediately the process completes, a green-circled button would appear bearing the message "You have successfully restored the stock ROM".
 2:55 AM
 G3C0L Tool


 Posted in:


0 comments:
Post a Comment